Happy Holidays!
Best wishes and good eating!
Sunday, December 25, 2011
Friday, December 16, 2011
My Blank Canvas
This is it.

And it's mine (mostly).
Volia, Le Petit Bar - bar a vins et charcuterie. Le Bar est situe sur la rue Water a Peterborough.(Forgive my French, but I'm trying to improve... I am, after all, about to open a Parisian-inspired wine and charcuterie bar)
Roland and I are very excited to be entering this new venture. I hope you'll follow us along as we build this new bar.
Make sure you visit us here: www.lepetitbarpeterborough.blogspot.com to follow our bar building adventures, and watch for our twitter feed: @lepetitbarptbo
Tuesday, November 29, 2011
I have something to tell you...
Shhhh. I have a something to tell you. But, I'm going to keep you in suspense. All will be revealed. I promise. And, I hope, you'll find it's been worth the wait. That is, if you are still out there, reading this. I am the girl who cries wolf, with my promises of a new post, photos, recipes and food ideas. I hope when I can tell you my secret, you'll understand why I have been too preoccupied to share with you.
I have many great photos to share - lots of delicious Belgian beers, and I'm going to get those on here. Really, I am.
Last night I roasted a pork tenderloin over a trivet of onion, garlic, carrot, celery, rosemary and pear. A little chicken stock added to the drippings and some cold butter (off the heat, of course) for body and it made a dynamite sauce to go with a perfectly cooked pork tenderloin - the most perfect I've ever cooked. After eating pork tenderloin at Mesa Grill, Bobby Flay's restaurant in Las Vegas (I know what you're thinking... and you can't believe I buy into that whole celebrity chef thing. BUT - the food.... incredible) at a perfect medium rare, I am no longer afraid to under-cook pork. I know you can safely enjoy pork at a nice medium temp, but that med-rare piece I had at Mesa Grill was a revelation. It's just better. In fact, it's a amazing. So, here's the secret friend - prob with a thermometer regularly, and get that bad boy out of the oven at 145 degrees. Let it rest. You'll be pleased with yourself.
To serve with this pork tenderloin I braised some cabbage with caramelized onion & pear, anise seed, some champagne vinegar and chicken stock. Also awesome. I feel particularly proud of this dinner, and I have no evidence of it. I was so eager to devour the thing I didn't photograph it.
Oh - do you know I have a Twitter feed? Please read! @shanlmak
The next few months are going to bring with them lots of recipes for pate, rillets and terrines, cured meats and fish, condiments and pickles. And, I'm going to share those recipes and experiences here. There's a little bone for you... figured out my secret yet?
Till next time...
(hope you're all eating well)
Saturday, November 5, 2011
Brugge, Antwerpen, Bruxelles
In three days. We leave in three days for Belgium - Bruges, Antwerp and Brussels.
Most excited for: beer (duh), food (of course) and street style (Antwerp)
Have been so busy lately - it's fantastic, I'm bogged down with communications work, but it means I haven't found the time to write or post photos of some of the great food we've been eating and making.
Heading this afternoon to Viamede Resort, about 45 minutes outside of Peterborough. They raise Tamworth pigs on the resort and today they're hosting a hog roast. Covering the story for Pearl Magazine, and I will post photos about the experience here.
If you're still reading this... you're wonderful.
Let me catch up with work and I'll be posting more food experiences and recipes.
xoxo
Monday, October 10, 2011
Post Over Due
It's been a long while, and I haven't written anything here on my quiet blog.
Now I'm in a coma from the turkey soup that I made after recovering from the turkey coma I self-induced at dinner last night with 13 of my family members all squeezed into my very small living/dining room.
Turkey was awesome. So was the stuffing, the gravy - giblet gravy always scared me, but I'm definitely doing it again after this experience! - and the potatoes, roasted in duck fat like potatoes always should be.
I also have to update you on my trip to Las Vegas - weird city, pretty great food, baffling culture.
All of this has to wait; I need to recover from Thanksgiving first.
Hope you've had a lovely weekend - what a beautiful weekend!
Wednesday, August 31, 2011
Tomatoes and Mozzarella
It's finally here. We have been waiting a long time, since March, for this moment. This is the time I look forward to every summer. This is why we grow a garden in our backyard. It's time. Time, to harvest the tomatoes. Look at them!

 Since starting our garden we have grown heirloom varieties. I'm still learning, and I don't know all their names, but we have heirloom tomatoes and heirloom paste tomatoes - the best for making sauce - in our tomato raised bed.
 The plants are heavily weighed down with tomato fruit, and everyday there are ripe tomatoes to harvest. This Satruday will be the first of an upcoming few where we spend all day processing tomatoes for canning. Those paste tomatoes will turn into puree, sauce, salsa and ketchup. The colourful heirlooms will be used for fresh pasta, pizza and Caprese salads - one of my favourites.
 Caprese salad, or Insalata caprese, is so delicious because it is so simple. Only worth eating when all of the ingredients are in season, it's the freshness and ripeness of the tomatoes, basil and fresh mozzarella coming together that creates a taste experience worth revisiting. It's true that what grows together goes together, and we know basil and tomato are best friends. Their second best friend, mozzarella, is best when it's fresh - no rubbery yellow cheese balls, please - and worth trying to make yourself.
In the August/September issue of PEARL magazine I write about St. Veronus Cafe and Taproom's new menu and their homemade fresh mozzarella cheese. Chef Susan Houde flavours her mozzarella with Affligem beer and seasonal ingredients to create a seasonally evolving salad, a staple of the menu. She shared her recipe with me, and I'm going to include it here.
Now, I have tried making mozzarella and I wasn't as successful as Susan. Rennet and citric acid (this is a powder) are essential to successful mozza. From experience, you cannot replace the citric acid with lemon juice.
You can find citric acid at health food stores (Joanne's or the Main Ingredient in Peterborough carry it). I purchased my rennet from the Empire Cheese vendor at the Saturday Peterborough Farmer's Market. He looked at me like I was crazy - why on earth would I want to make my own cheese? After making some successful fresh ricotta cheese I can tell you that it is very, very, very rewarding. That is why you should make your own cheese.
Susan told me that while there are many steps to making mozza, it's actually fairly simple. What's important to remember is that once the ingredients have come to the right temperature, and you're ready to start working the mozzarella, things happen very fast. Read the recipe a few times so that you have a good grasp of how and when you need to jump to action. You need to stretch and play with the curds in order for them to come together into mozzarella. The curds need to be warm for this. Susan has said that this stage just takes practice - the more you do it, the more you recognize how the curds should feel before being shaped into the mozzarella.
You will need:
Stainless steel pot
Candy thermometer
Bottled/filtered water
Cheesecloth and strainer or colander
Wooden spoon
Knife
Fresh Mozzarella Cheese
This recipe is designed to make a large batch for a restaurant's use. You will want to reduce the measurements quite a bit if you're just making it for your Insalata caprese or pizza margharita
12 L homo milk
2 tsp citric acid
1 tsp rennet mixed with 2 cups bottled water
1. Pour the milk into a stainless steel pot
2. Heat, stirring, to 80 degrees Fahrenheit
3. Add citric acid, continue to heat to 90 degrees Fahrenheit
4. Once temperature is reached, turn the burner off
5. Add rennet, stir and leave to curdle (about 20 minutes for this large batch)
6. Cut into the curds making a criss-cross pattern
7. Heat curd mixture on high for 10 minutes
8. Strain mixture into a strainer or colander lined with cheesecloth set over a pot. This will allow the whey to drain from the curd. Reserve whey.
9. Press curds (in cheesecloth and colander) to remove moisture
10. Heat the whey (which has been reserved in the pot), to 165 degrees Fahrenheit
11. Add the curd back into the whey for a few seconds to reheat the curd - it must be warm to stretch
12. Stretch and shape the curd, pulling it and pinching it into a ball
13. Store the mozzarella ball in cold water and salt, or, like they do at St. Veronus, in some beer
Alternatively, you can purchase some lovely Buffalo mozzarella at Chasing The Cheese on Water Street. I spent some time with Jacquie Mellor, an employee of Chasing The Cheese, and she gave me some great tips on composing a cheeseboard. I won't overload you with them now, but watch for them in my next post.
Good eating!


Thursday, August 11, 2011
It's been a while...

Hi.
Sorry I've been MIA.
Summer is always so busy. Work picks up, social life picks up, housework picks up...
 I've been away from my blog for over a month and I've been thinking about it a lot. I needed to return.
 I've been cooking a lot. Using up all the great things growing in our backyard and coming into season at the Farmer's Market. This is truly the best time of year to be cooking. Everything is so fresh and delicious. Everything tastes good together! I can't divulge everything I've been doing in the kitchen over the six weeks I've been away, so here's a collection of thoughts that will give you a quick snap shot of my summer so far.
 My new favourite ingredient is chili - fresh or dried. I'm using it in everything. Dried chili sauteed with Swiss Chard, in soups, sauces, roasted with vegetables. Fresh chili in salsa, marinades and salad dressings. I believe it is as essential as fresh lemon. It adds flavour, brightness and an overall better-ness to everything I make.
 I love cooking in summer because everything can be done outdoors and tastes great with next to no cooking - as contradictory as that sounds. This week we enjoyed linguine with a next-to-not-cooked tomato sauce: local cherry toms crushed with some melted butter, balsamic, fresh herbs and chili, of course. I added some onion chevre from local goat farmers and cheese makers Cross Wind Farms. It was simple, fresh and tasty.
 Roasted cauliflower, while roasting is not very summery, is awesome. I've had it at two great Toronto restaurants over the last six weeks and copied their recipes at home. Last week I went to Brockton General on Dundas West for the first time. It's a really cool little spot. They print the day's menu on a large roll of butcher paper pulled down along the wall. You get what's on offer, and, if my one visit is any indication, the few things on offer are always good. Roasted cauliflower with garlic, bacon and fresh basil. So delicious. I did it at home minus the bacon adding chili, lemon juice and celery.
Celery is one of my new favourite vegetables. While I find it rather boring raw, it's fantastic sauteed or roasted. We know celery is essential when making a roast (a trivet of celery, carrot and onion makes gravy) and that it is crucial in mirepoix (the base of many soups and sauces), but it will also contribute great flavour to vegetable and lentil dishes. I've been using it a lot in new ways and I can taste the difference. Next time you roast or saute a vegetable throw in a little chopped celery for flavour. It's not meant to be the star of the dish, but it will become an ingredient you talk about, as in "wow, that celery really makes a difference!"
 Peas are a spring vegetable. Did you know that? If you get greedy and decide you are going to leave the pod on the plant because you think it'll get bigger and you'll have massive peas (why you ever wanted that is still inexplicable) what will happen is the pod will start to dry and shrivel. You'll, unintentionally, have dried peas. Dried peas are great if it's the dead of winter and you want to make split pea soup. They are incredibly disappointing when it's the height of summer and you've waited three (or four) long months for sweet, fresh, spring peas. Too bad you're so greedy...
Fava beans are awesome. I think I already knew this, but now that I grow them and eat them the day they are picked I really know their awesome-ness.
 And... while on the topic of the garden. The tomatoes are turning colour and my garlic is ready to eat. I'm sorry if this seems a bit too precious, but when I'm cooking and using the garlic I've grown in my backyard instead of the stuff you buy from the grocery that comes from China, I feel great. It's. Really. Great.

See you soon. Real soon.
Thursday, June 16, 2011
Cream scones and rhubarb fool
We're refinishing the floors in our home this weekend.
 We're going to pack all our first-floor furnishings into our kitchen and move in with some friends for two nights. I know when they are done the floors are going to look great, but it means a whole weekend without the kitchen. A whole weekend off from work without a kitchen. There's a lot that I could be doing in there with a whole weekend off...
 One of my favourite food blogs is Orangette by Molly Wizenberg. Her photos and writing inspire me all the time. She is a real example of someone who, through shear determination and by staying true to herself, has accomplished the elusive goal of earning a living doing exactly what she loves - thinking, writing, talking about and making food.
A couple blog-posts ago, Ms. Wizenberg wrote about cream scones and their beauty as a breakfast/brunch treat. It inspired me to make some of my own...
 These scones are credited to a fabulous recipe in the Cook's Illustrated Baking book. It is, hands-down, the best baking book I own. The recipes are tried and tested, and the result is a list of dos and don'ts, detailed instructions and the best ingredients.
These scones take 20 minutes to throw together and they are delicious. Moist, just cakey enough, flavourful, light, creamy... this recipe makes perfect scones. It's easy to dress them up by adding orange zest, lemon zest, vanilla sugar (instead of granulated sugar), currants, cranberries... maybe my next attempt will be savoury with sun-dried tomatoes and fresh basil...
 Cream Scones Adapted from Baking Illustrated by the editors of Cook's Illustrated magazine
2 cups unbleached all purpose flour
1 tablespoon baking powder
3 tablespoons sugar
1/2 teaspoon salt
5 tablespoons cold unsalted butter, cut into 1/4-inch cubes
1 cup heavy cream
1. Adjust oven rack to middle position and heat oven to 425 degrees (the first time I made these, 425 proved a little hot in my oven - they got golden real fast and were a little underdone in the centre. I recommend a 400 - 425 degree oven and a slightly longer cooking time).
2. Place flour, baking powder, sugar and salt in work bowl of food processor fitted with metal blade. Process with six 1-second pulses.
3. Remove the cover of the food processor and distribute the butter evenly over the dry ingredients. Cover and process with twelve 1-second pulses. Add any additions (zest, fruit) and pulse once more. Transfer to a large bowl.
4. Stir in heavy cream with a spatula until a dough starts to form, about 30 seconds.
5. Transfer dough and any dry flour bits to a workspace and knead by hand just until it comes together into a rough, slightly sticky ball.
6. Flatten dough into a rough, wide disk, and cut into wedges. Place wedges on ungreased baking sheet.
7. Bake until the tops are light brown, 12 - 15 minutes (or longer if you use a lower heat... keep an eye on them). Cool on wire rack for at least 10 minutes before serving.
These scones keep fairly well in an air-tight container, but definitely taste best the day they're made. As it's rhubarb season, or just the end of it now, rhubarb compote is a lovely spread for these scones. So is a thick layer of butter.
 Rhubarb grows in my garden, and it grows like crazy (which I've heard rhubarb tends to do). I've struggled in past years to think of how to use it, and this spring I discovered the versatility of rhubarb compote. Rhubarb compote comes in handy when you are making rhubarb whiskey sours (thank you LCBO Food and Drink magazine for one fabulous idea), in need of a seasonal fruit spread for toast or cream scones, or want to make a quick, light, lovely dessert like this one:
Rhubarb Mascarpone Fool
This is my own recipe, and it's a wing it type of recipe, so bare with me.
 I love this kind of dessert because you can whip it up in minutes when you have a sweet craving, because it's light and refreshing, and because it looks elegant but is so easy.
Rhubarb Compote
A good fistful of rhubarb, or more depending on how many you are feeding
Sugar, to taste
A splash of liquid (water, wine, liqour)
1. Roughly chop the rhubarb into small pieces and add to a saucepan.
2. Sprinkle sugar to taste over the rhubarb (rhubarb is tart, so I recommend at least 2 tablespoons).
3. Heat rhubarb and sugar over medium heat, until the sugar starts to melt
4. Add a splash of liquid to de-glaze the pan.
5. Let simmer until rhubarb has softened and compote looks thick and nearly smooth (there will still be softened whole rhubarb in the mix). Take compote off the heat and let cool before refrigerating or using.
Fresh grated ginger is nice added to this compote, so is vanilla. Add to taste with sugar.
Rhubarb Mascarpone Fool
This recipe makes roughly four portions
1 cup room temperature Mascarpone cheese
2 tablespoons sugar
1-2 tablespoon Pims or other fruity, fresh, summery liqour
1 cup whipping cream
1 teaspoon pure vanilla extract or half a vanilla bean
16 amaretti cookies
Rhubarb Compote
1. In a large bowl mix Mascarpone cheese with 1 tablespoon of the sugar, a good spoonful of the Rhubarb compote and the Pims with a fork or whisk until smooth.
2. In a medium bowl, whip cream with remaining sugar and vanilla (extract or the seeds of the bean).
3. Fold one quarter of the cream into the Mascarpone so that the cheese mixture looks light and fluffy.
4. In parfait dishes, or pretty glass bowls, crumble one amaretti cookie (in each dish).
5. Now start layering your dessert: rhubarb compote, Mascarpone, whip cream, crumbled amaretti cookie; until you've filled the dish. Finish with a small spoonful of rhubarb compote and a crumbled cookie.
The amaretti cookies add a lovely amaretto-flavoured crunch to the dessert and the Pims just seems right with the rhubarb; so English! This dessert is a real winner.
Friday, May 27, 2011
Old friends... and aged beef
A couple Saturdays ago, some old friends (the best kind) came for dinner. I planned the kind of meal that encourages you to sit, and munch, and taste, and chat, and rest, and munch again... the kind that goes very well with bottles of vino and conversation. The first time I had this meal was with my good friend Yani. She made this for me when she was visiting from Vancouver in February. We spent hours eating and drinking and chatting and then went dancing. Since then, I've enjoyed it with a number of good friends. I'm sorry, I don't have a photo for you, but here's the gist:
Calamari & Tomato Stew
(this dish may have a real name, but I'm not sure what it is... perhaps it's something Italian...)
-For four people, you need about 2 pounds of squid, cleaned and chopped
-Garlic - at least 6 cloves
-One medium sized onion, diced
-Four carrots, grated or diced
-Bay leaves
-Fresh thyme
-White wine - about half a bottle
-Capers
-Chili flakes
-Fresh parsley
-Pitted Kalamata olives
-One tin of whole tomatoes
-One tin of tomato puree - not tomato paste. I used puree I made last summer, and it's much more liquid than the puree you buy in the grocery store. If you have a grocery store tin, you should thin it out with some water. You want a soupy/brothy stew
In a large pot, saute the onion, carrot and garlic (about three cloves minced) in olive oil over medium heat with a teaspoon of salt until they start to turn translucent and are aromatic. Don't caramelize the onions. Add a teaspoon (or more if you like it spicy!) of chili flakes and stir until aromatic. Remove the leaves from your fresh thyme and add to the pot (as much as you like). Pour in about 3/4 of the wine to de-glaze. Add your tomatoes; mash the whole tomatoes up with a wooden spoon. Add bay leaves and let simmer. Taste and adjust seasoning (I like to add a dash of balsamic vinegar and/or some brown sugar to cut the acidity of the tomato).
In a skillet, saute garlic (the other three cloves minced) in olive oil over medium heat until aromatic - do not burn. Add chopped squid and lightly saute. Add the rest of the white wine and let squid cook until lightly firm but not rubbery. Pour the contents of this skillet into the pot with the tomato and wine. Let these flavours meld together for a few minutes. Add the capers and olives to taste (remember they are salty), and some chopped fresh parsley. Serve with fresh bread and a green salad.
Another great meal to share with friends is a traditional Sunday supper. It's one of our favourite meals to cook for friends. Recently, Roland and I served roast beef and Yorkshire pudding to friends for dinner. I'm very in-favour of aging beef before it is roasted. This is very easy to do, and truly improves the flavour of the roast. While I don't have any photos of this fabulous Sunday supper, I would like to share with you how to age a lovely piece of beef in your refridgerator.
We get our meat from a local farmer - we participate in their meatshare. We give them a little sum of money, and they give us Angus beef - pastured raised, Tamworth pork, Shopshire lamb and free-range chicken. The meat is so good, that all it needs is to be roasted with a little salt and pepper. Aging this meat only enhances its deliciousness.
This couldn't be easier: take your thawed piece of beef and place it on a cooling rack set over a rimmed baking tray. Cover the roast lightly with a few pieces of paper towel or a clean tea towel. Find room in your fridge, and set the tray (with beef) in the fridge. Leave it alone for a few days - the longer the better. The day you plan to cook the beef, remove it from the fridge and carefully slice off the dry, leathery bits on the outside of the roast. Let come to room temperature before you roast using your preferred method.
Friday, May 20, 2011
Garlic! and tomatoes! and raised beds! Oh my!

This year, Roland built me some raised beds. They are gorgeous.

Goin
 g into these plush growing plots are tomatoes, basil, parsley, lettuce, salad greens, beans, peas, radishes, carrots and cucumbers.
In other parts of the garden... garlic is growing.
I just finished a piece for Pearl Magazine (www.pearlmag.ca) about garlic scapes and some favourite Peterborough Farmer's Market vendors, Christine and Romeyn Stevenson of Ashburnham Farms and Gaelic Garlic.
Christine and Romeyn are lovely people, committed to sustainable farming. They plant all their garlic by hand, and raise all-natural pasture fed beef. Christine told me their cows are essential to their garlic production - they need the manure in order to grow their fantastic garlic. I love that - the circle of life.
 Last fall I planted 12 cloves of garlic. They are shooting out of the ground now - leafy, layered green flora promising scapes by mid-June and garlic by mid-July.
Planting garlic cannot be easier:
1. Separate the cloves - leave the cloves whole!
2. Plant late September/early October. Timing is everything. It's important that the plant develops a root before the ground freezes, but doesn't start shooting out of the ground until the following spring, when there is no chance of fatal frost.
3. Plant about 1 inch deep and about 6 inches apart with the sprouting bit down.
4. Wait all winter long...
5. Visit your garlic plants in the spring - hopefully they are peaking through the ground.
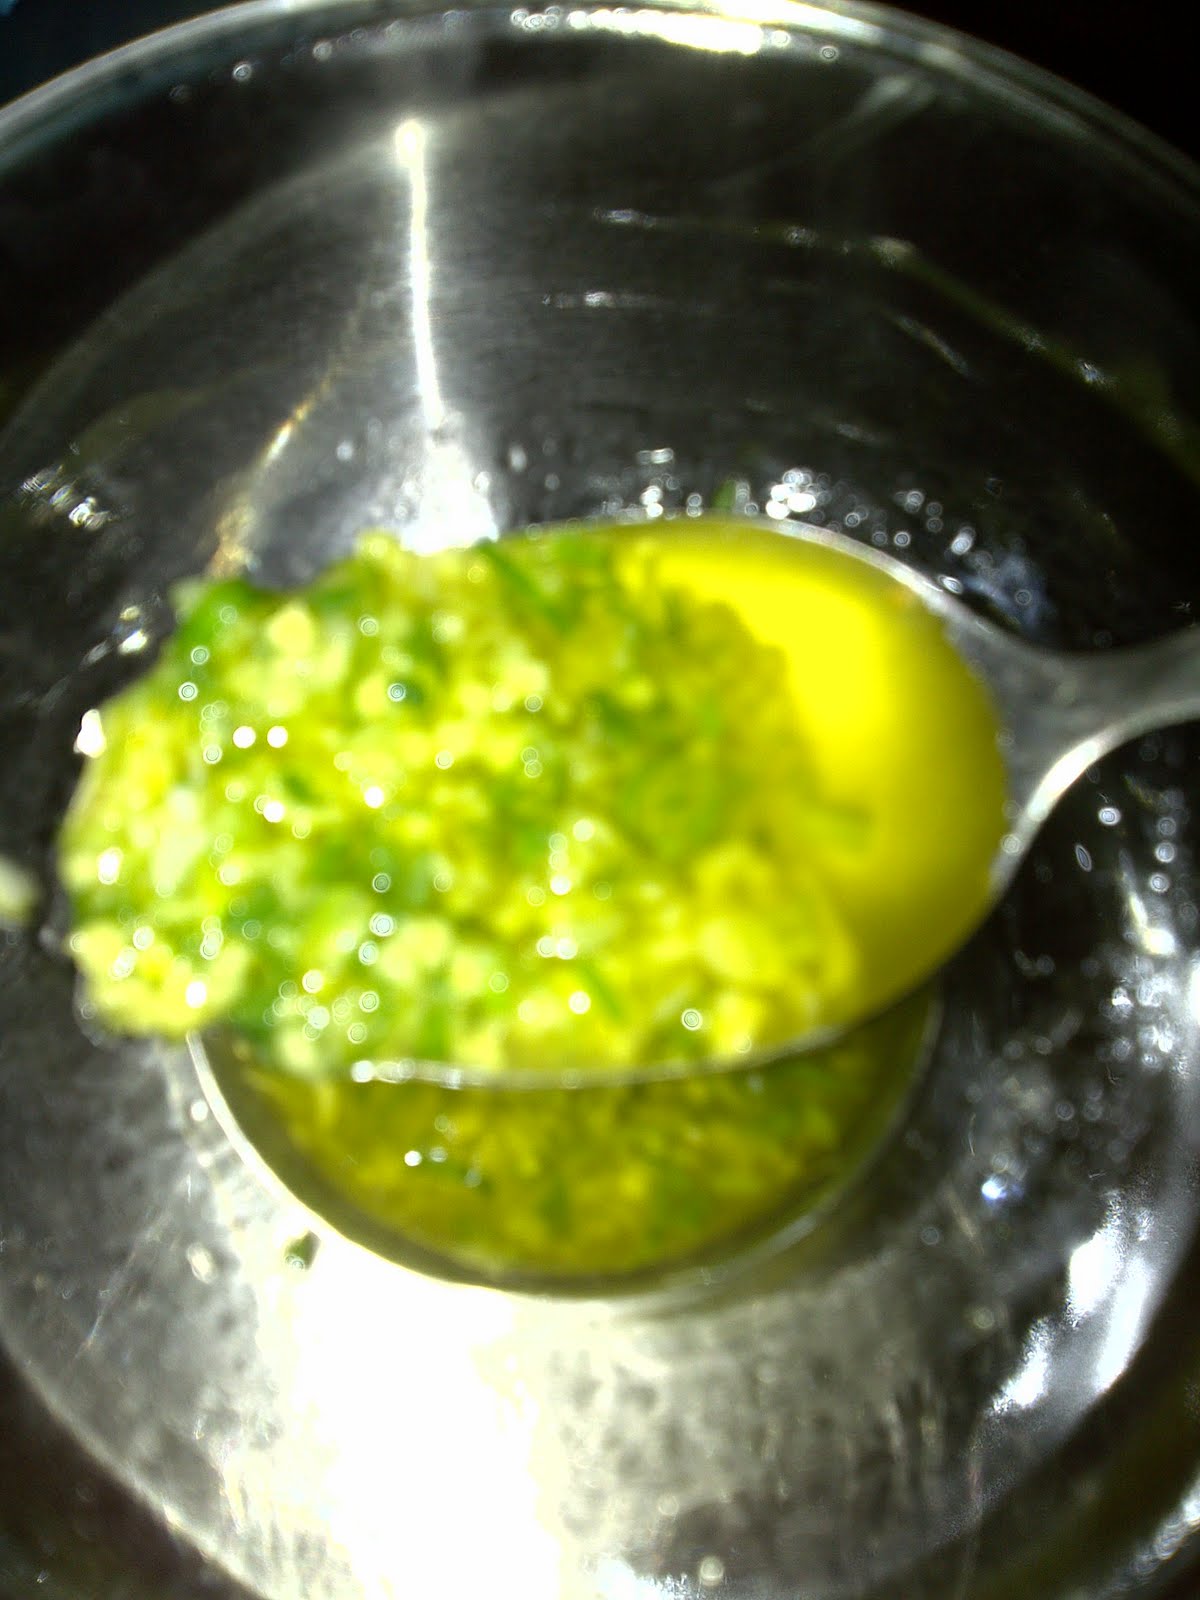
6. As they grow, they'll develop layers of foliage. From the centre of the garlic plant a firm, green, curling extremity will grow. This extremity is the scape, and it will develop a bud at its tip. Snap this scape off - it will encourage the plant to put most of its energy into developing the garlic bulb. The scape is delicious fresh or fried (there's a great pesto recipe in Pearl).
7. The layers of foliage will start to brown and wilt. This is a good sign your garlic is ready to be picked. Pull a bulb out. If it looks large enough to you, it's ready for harvesting.
8. Once harvested, the garlic needs to dry. Choose a well ventilated spot, out of the sun.
9. Trim the tops and bottoms of the bulb and enjoy! New garlic is called green garlic and is fresh and juicy. Garlic can also be dried and braided, something I'm going to try this summer.

This is a very exciting time at the Mak/Hosier homestead. I'm on the edge of my seat - this weekend will be very productive. Digging and planting and weeding and mowing and staking and watering and cutting and harvesting... it all begins this weekend.
While waiting out the winter for fertile summer we like to exercise our cooking skills. It's become a mission to perfect homemade pasta. We may be getting close. Roland is the pasta maker in our home, and I'm the saucier. It's very rewarding to watch him improve his technique with each crank of the pasta roller.
Over time he has developed a feel for fresh pasta, but his basic recipe is an unmeasured amount of tipo "00" flour, one or two eggs and an occasional splash of olive oil. Soft wheat flour type "00" is essential to getting the right texture. You can find this type of flour in gourmet food shops.
I realize Roland's recipe isn't helpful for first time pasta makers, so I've included a great starter recipe from Jamie Oliver. This recipe makes a load of pasta, so you may want to half or quarter it. He uses much more egg than Roland, which will contribute to the flavour of the pasta, but will also result in a wetter dough - something that's more challenging to knead and roll.
A basic recipe for fresh egg pasta dough
from Cook with Jamie by Jamie Oliver
5 cups tipo 00 flour (pasta flour)
6 large free-range or organic eggs or 12 yolks
Place the flour on a board or in a bowl. Make a well in the centre and crack the eggs into it. Beat the eggs with a fork until smooth. Using the tips of your fingers, mix the eggs with the flour, incorporating a little at a time, until everything is combined. Knead the pieces of dough together until you have one big, smooth lump. Wrap in plastic wrap and let rest in fridge for 1/2 hour.
Jamie's excellent recipe goes on to provide detailed instructions on rolling out pasta and shaping it. I'm going to offer my own advice here:


Monday, April 25, 2011
Let them eat bread
It's easy to forget what we are capable of. Life, work, situations become too comfortable and we let ourselves give up just a little bit. It's easy to become content with not reaching our full potential. I know what this feels like and it's hard to motivate yourself to combat it.
Today I will concentrate on the things I love. Those things that inspire me, those things I look forward to, that I take pride in and that I find pleasure in.
Enjoying a quiet coffee alone with the paper, the Wednesday Life section of the Globe and Mail (it's the food issue) and its Saturday Style section. Sleeping in, waking early to a day off and no scheduled plans, feeding my brothers, feeding my friends, feeding Roland. Watching seedlings grow, sketching garden plans, planning supper, getting to watch Oprah in the middle of the day. Spending Saturday morning at our Farmer's Market, cooking and baking.
 Baking is so satisfying. A meeting of science and creativity. Careful and precise measurements, chemical reactions that make dough rise, pastry flake and crumb moist. Honing a feel for baking is an accomplishment. Reaching a point where you can tell how dense, tender, glutenous and flaky pie pastry will turn out just by the way it feels when it's raw in your hands is enlightening. At least it was to me.
Every time I bake a pie I feel good. Each time I take bread out of the oven, lean in close to hear it cracking, whispering to me that it's perfect, I feel total satisfaction. This bread recipe is the easiest thing in the world. You might not even believe how easy it is, until you try it. Even if you know absolutely nothing about baking, you're going to succeed with this recipe. It results in a perfectly crusty loaf of sourdough bread, with a toothsome, tender crumb. It's the best way to start my week and a helpful reminder that simple things make me happy, comforted and remind me who I am and where I can go.
This recipe has appeared many times on-line. It is Jim Lahey founder of The Sullivan Street Bakery in New York City's no-knead bread recipe. Jeffery Steingarten wrote about it in Vogue Magazine, Mark Bittman introduced the world to this recipe in the New York Times. I am going to share it with you here, at buddinggourmand.
This loaf of bread is a miracle because it requires no kneading. It does, however, require time and patience.
The Basic No-Knead Bread Recipe from Jim Lahey
3 cups bread flour (you can substitute whole wheat or rye, I usually use a combination of whole wheat and white bread flour)
1 1/4 teaspoon table salt
1/4 teaspoon instant or other active dry yeast
1 1/3 cup cool water
wheat bran, cornmeal or additional flour for dusting
You will also need:
parchment paper
dutch oven or heavy lidded pot (4 1/2 - 5 1/2 quart)
clean tea towel
large bowl and wooden spoon
Combine the flour, salt and yeast in a bowl. Add the water and mix until you have a sticky, shaggy dough. It should be very sticky - if it's not, add a little more water until it is. Cover the bowl with plastic wrap and let it sit at room temperature, out of direct sunlight, until the surface is dotted with bubbles and the dough has more than doubled in size. The dough will sit for 12 - 18 hours. I usually do this step in the evening, leaving it to rest over night, so that I can bake the loaf the next morning.
Once the bread has sat for its 12 - 18 hours, doubled in size and bubbled (this is the first fermentation), generously flour a work surface and scrape the bread dough onto the surface. This dough will be quite sticky, it will cling to the bowl. This is correct; do not add more flour to the dough. Lift the edges of the dough towards the centre shaping the dough into a round.
Flour a large square of parchment paper. Gently life the dough and place on the parchment paper seam side down. Dust generously with more flour and cover loosely with the clean tea towel. Leave the dough to rise another hour to two hours in a warm spot until it has doubled in size and springs back when poked.
Half an hour before you think the dough has finished it's second rise (I usually poke the dough after an hour, if it doesn't bounce back quickly I leave it for another half hour and then move onto this step) preheat your oven to 475 degrees F with the rack in the lower third position and place the covered (lidded) heavy pot in the centre of the rack. Leave the pot in the oven to heat up (about half an hour).
Using oven mitts, carefully remove the pot from the oven and uncover it. Take the tea towel off the dough, lightly dust again with some flour and quickly invert the dough into the pot - be careful! That pot is hot! Cover the pot and return it to the oven. Bake for 30 minutes.
Remove the lid and continue baking until the bread is a deep chestnut or golden brown (but not burnt), anywhere from 15 min to half an hour. Use pot holders to carefully lift the bread out of the pot and let it rest on a cooling rack. Listen to it happily crack and tear into it after it has cooled at least an hour.

Today I will concentrate on the things I love. Those things that inspire me, those things I look forward to, that I take pride in and that I find pleasure in.
Enjoying a quiet coffee alone with the paper, the Wednesday Life section of the Globe and Mail (it's the food issue) and its Saturday Style section. Sleeping in, waking early to a day off and no scheduled plans, feeding my brothers, feeding my friends, feeding Roland. Watching seedlings grow, sketching garden plans, planning supper, getting to watch Oprah in the middle of the day. Spending Saturday morning at our Farmer's Market, cooking and baking.
 Baking is so satisfying. A meeting of science and creativity. Careful and precise measurements, chemical reactions that make dough rise, pastry flake and crumb moist. Honing a feel for baking is an accomplishment. Reaching a point where you can tell how dense, tender, glutenous and flaky pie pastry will turn out just by the way it feels when it's raw in your hands is enlightening. At least it was to me.
Every time I bake a pie I feel good. Each time I take bread out of the oven, lean in close to hear it cracking, whispering to me that it's perfect, I feel total satisfaction.
 This bread recipe is the easiest thing in the world. You might not even believe how easy it is, until you try it. Even if you know absolutely nothing about baking, you're going to succeed with this recipe. It results in a perfectly crusty loaf of sourdough bread, with a toothsome, tender crumb. It's the best way to start my week and a helpful reminder that simple things make me happy, comforted and remind me who I am and where I can go.
This recipe has appeared many times on-line. It is Jim Lahey founder of The Sullivan Street Bakery in New York City's no-knead bread recipe. Jeffery Steingarten wrote about it in Vogue Magazine, Mark Bittman introduced the world to this recipe in the New York Times. I am going to share it with you here, at buddinggourmand.
This loaf of bread is a miracle because it requires no kneading. It does, however, require time and patience.
The Basic No-Knead Bread Recipe from Jim Lahey
3 cups bread flour (you can substitute whole wheat or rye, I usually use a combination of whole wheat and white bread flour)
1 1/4 teaspoon table salt
1/4 teaspoon instant or other active dry yeast
1 1/3 cup cool water
wheat bran, cornmeal or additional flour for dusting
You will also need:
parchment paper
dutch oven or heavy lidded pot (4 1/2 - 5 1/2 quart)
clean tea towel
large bowl and wooden spoon
Combine the flour, salt and yeast in a bowl. Add the water and mix until you have a sticky, shaggy dough. It should be very sticky - if it's not, add a little more water until it is. Cover the bowl with plastic wrap and let it sit at room temperature, out of direct sunlight, until the surface is dotted with bubbles and the dough has more than doubled in size. The dough will sit for 12 - 18 hours. I usually do this step in the evening, leaving it to rest over night, so that I can bake the loaf the next morning.
Once the bread has sat for its 12 - 18 hours, doubled in size and bubbled (this is the first fermentation), generously flour a work surface and scrape the bread dough onto the surface. This dough will be quite sticky, it will cling to the bowl. This is correct; do not add more flour to the dough. Lift the edges of the dough towards the centre shaping the dough into a round.
Flour a large square of parchment paper. Gently life the dough and place on the parchment paper seam side down. Dust generously with more flour and cover loosely with the clean tea towel. Leave the dough to rise another hour to two hours in a warm spot until it has doubled in size and springs back when poked.
Half an hour before you think the dough has finished it's second rise (I usually poke the dough after an hour, if it doesn't bounce back quickly I leave it for another half hour and then move onto this step) preheat your oven to 475 degrees F with the rack in the lower third position and place the covered (lidded) heavy pot in the centre of the rack. Leave the pot in the oven to heat up (about half an hour).
Using oven mitts, carefully remove the pot from the oven and uncover it. Take the tea towel off the dough, lightly dust again with some flour and quickly invert the dough into the pot - be careful! That pot is hot! Cover the pot and return it to the oven. Bake for 30 minutes.
Remove the lid and continue baking until the bread is a deep chestnut or golden brown (but not burnt), anywhere from 15 min to half an hour. Use pot holders to carefully lift the bread out of the pot and let it rest on a cooling rack. Listen to it happily crack and tear into it after it has cooled at least an hour.

Friday, April 1, 2011
Beer vs. Wine
St Veronus hosted its first beer vs wine paired dinner this week. The winner: beer.

Described as the "Ultimate Pairing Dinner", this night was a chance to pit beer and wine, notorious enemies, against each other in a battle of the palate. Which would make a better pair for lobster, steak tartar, duck and lemon mousse? Who would reign supreme amongst beverages? Each course was paired with a wine and beer and the guests chose the best food match of the two. It was a close call - beer won by 8 votes total, taking two of the four courses. Wine, also a winner of two of the four courses, just came short overall and must now wallow in its total failure.
First course:
Butter poached lobster on barley risotto cake with garlic-mushroom duxelle and arugula
Butter poached lobster on barley risotto cake with garlic-mushroom duxelle and arugula
While the dish as a whole was delicious, the bold flavours of the barley, duxelle and arugula overtook the delicate lobster. A challenge to pair, the winner of this round was wine: a Riesling Kabinet. Duvel, a top fermented big bodied pale ale, lost to the off-dry white, which maintained its sweetness when enjoyed with the barley and the lobster. The Duvel became a little bitter when paired with the dish.
Second course:
Steak tartar (yum)
Steak tartar (yum)

Freshly minced tenderloin mixed with cornichon, white onion and raw egg. Dressed with crostini, fried caper, and a tamarind-anchovy gastrique. This dish was dynamite! The flavours sang... tender delicate beef uplifted by crunchy bold onion, sweet & sour cornichon and that tangy gastrique boasting an uncanny similarity to Worcestershire or HP sauce... meat's guilty pleasures.

Wine: a Portuguese tempranillo. Beer: Rodenbach Grand Cru - a sour brown beer. The beer was by far the winner. The sourness of the ale complemented the gastrique - a flavour match. The irony-metallic qualities of the raw beef brought out the minerality of the beer. And while the beer is mouth-puckeringly flavourful, a great foil for the sour-tangy brightness of the dish, it did not overpower the tender raw meat.
Main course:
Duck confit with cranberry jus, mashed parsnip and candied yam

Duck confit with cranberry jus, mashed parsnip and candied yam

Wonderful duck confit. Skin not as crispy as I may have liked, but the meat was tender - pulled away from the bone with ease - completely moist and flavourful, its gamey qualities still present, but delicate. This was a hard one to call. The wine: 13th Street Gamay Noir from Niagara. The beer: Aventinus Dopplebok. So close. Gamay is a perfect match for duck. The cherried flavours of the wine complemented the jus and were a great match for the candied yam. But the beer - earthy and fruity - was too great a match with duck's gaminess. By a small margin, beer wins this round, however, that fantastic duck was the true winner...

Dessert:
Lemon mousse with white chocolate creme anglaise and coconut tuile


Decadence. Light, creamy and refreshing. A real tough pair with beer. The beer: Blanche de Chambly. Just not a match. The wine: botrytis affected Chenin Blanc from the Loire Valley. The dessert wine was an obvious winner, with its citrusy sweetness.

A great night of great food, great debate and discussion, and great company. Looking forward to the next beer dinner.

Wednesday, February 9, 2011
Kung Hei Fat Choy

Last Thursday marked the beginning of the Lunar New Year. As celebrations around the world start winding down, I give you my first try at one of my favourite Cantonese-style dishes, Soy Sauce Chicken.

It's not fancy, or complicated. It's just great comfort food and one of my favourite things to eat.
Traditionally, a whole chicken is braised in soy sauce and spices. It sits sometimes for hours in this mixture, the soy sauce steeping into the meat. The skin glistens with sticky sweet soy sauce-y goodness and the meat becomes tender and flavourful. It's served with my hands-down favourite condiment, ginger and scallion sauce. The dish requires some work and some time, which I sorta found out too late, but is worth it. I believe I made one of the best soy sauce chickens I've ever had...

I was making this dish for two - Roland and myself. What I had was a five pound bird. A little large for two. So, untraditionally, I broke the chicken down, deciding to braise both breasts and one thigh and turning the rest of the carcass into stock. This actually contributed to a better overall product... I'll explain later.
First step is to create the braising liquid. Soy sauce, water, sugar, ginger, garlic, scallion, cinnamon stick, star anise, cooking wine, pepper. This boils and cooks before the chicken is added to the pot. This sauce smells divine. Lightly sweet, rich and aromatic - the cinnamon and star anise filled the kitchen with warm, spicy goodness.

The chicken cooks for about 40 minutes in the hot liquid and then sits, preferably for a few hours, in the braising sauce so it can penetrate deep into the meat...

The chicken is served sliced, with this great, zippy sauce of ginger and scallions. Minced ginger and scallions combine with salt, hot oil and a little chicken stock to create this addiction-forming sauce. It's sweet and tangy, salty, savoury, umami packed... it's a good thing.
If I had followed the recipe exactly, and let my chicken brew, we probably would have been eating dried out chunks of meat. I can see a whole chicken really benefiting from a long dip in the soy sauce, but nothing good was going to come of letting my smaller pieces of meat, off the bone, sit in this piping hot liquid for hours. Short on time, I sped through the last part of the recipe, removing the chicken pieces after about 20 minutes. The meat wasn't yet dried out, and had absorbed enough flavour. As an added bonus, it was bone and cartilage free. Traditionally the dish is served sliced with a heavy cleaver, each piece of meat sitting on its piece of jagged bone - one of my lesser favourite aspects of Soy Sauce Chicken. We enjoyed this dish with some ginger, garlic, chicken stock-steamed Chinese broccoli and rice. Happy New Year.

Bee Yin Low has a great recipe on Rasa Malaysia - an excellent source for Asian food recipes. I modified her recipe for our Soy Sauce Chicken dinner.
Subscribe to:
Posts (Atom)